Friday, October 27, 2023

Modifikasi pathname pada terminal linux menjadi lebih pendek


Bagi pengguna linux turunan ubuntu seperti ubuntu 16.04 yang saya gunakan, ada beberapa hal yang cukup membuat kita ribet dengan pathname pada mode text atau terminal. Terdapat dua jenis pathname pada mode text linux, kebanyakan ubuntu menggunakan model absolute path.

Perintah cd mengubah direktori saat ini ketika nama direktori disediakan oleh pengguna, 

Nama yang muncul ketika menggunakan pathname absolut (mis. cd /home/kuliahkomputer/web/kuliahkomputer.com/public_html) dan jika menggunakan pathname relatif  maka akan muncul seperti (mis. public_html/).

Kita dapat merubah default pada pathname, caranya sebagai berikut:

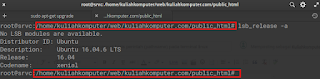
Kondisi awal seperti berikut:

root@srvc:/home/kuliahkomputer/web/kuliahkomputer.com/public_html# 

Hasil yang diinginkan seperti berikut:


[
root@srvc public_html]$
 Terdapat dua langkah untuk mengganti sebagai berikut:

Hal yang pertama dilakukan kita buka terminal.
Langkah untuk mengganti secara sementara ketikkan kode dibawah ini pada terminal:

PS1='\[\033[01;32m\][\u@\h \[\033[01;34m\]\W\[\033[01;32m\]]\[\033[00m\]\$ '


Kemudian tekan "enter".

Hasilnya sebagai berikut:


Langkah mengganti secara permanen lakukan perintah dibawah ini:


Buka konfigurasinya pada direktori home user  ~/.bashrc.
Buka dengan perintah

nano  ~/.bashrc

Cari konfigurasi berikut:


if [ "$color_prompt" = yes ]; then
#    PS1='${debian_chroot:+($debian_chroot)}\[\033[01;32m\]\u@\h\[\033[00m\]:\[\033[01;34$

    PS1='\[\033[01;32m\][\u@\h \[\033[01;34m\]\W\[\033[01;32m\]]\[\033[00m\]\$ '
else
    PS1='${debian_chroot:+($debian_chroot)}\u@\h:\w\$ '
fi

Ikuti pada tampilan diatas, kemudilan simpan konfigurasi dengan menekan ctrl+o.

Selesai.

Tuesday, June 1, 2021

How to Install XAMPP on ubuntu 16.04

 The "XAMPP" stack is an acronym where X stands for an operating system, A stands for Apache web server, M stands for MySQL or MariaDB database server and PP stands for PHP and Perl. So, as we are installing XAMP stack in our Ubuntu 16.04 linux machine, we can call is LAMPP stack where L stands for Linux. XAMPP stack is used together in a group in order to host dynamic PHP based websites and web applications. This setup enables us to run large numbers of web based applications and websites as we can find large numbers of PHP based web applications on the internet. Now, we'll move ahead towards the step-wise installation of XAMPP stack in our Ubuntu 16.04 machine.

System Requirements

Here's the minimum system requirements to install and run XAMPP stack in Ubuntu 16.04 LTS server.

RAM : Minimum 1GB memory
HDD : At least 1 GB free disk space
CPU : 1 Core Processor

Uzip File Command in Ubuntu


Unzip Into a Folder

All Linux and Unix systems ship with the unzip command. It’s a command-line utility allowing you to unzip a compressed file.

By default, the unzip command extracts the ZIP’s contents into the current directory. Instead of polluting the current directory with extracted files, you may unzip the files into a new folder using the unzip -d flag:

# “unzip -d” extracts the content into a directory
unzip path/to/file -d path/to/folder

# Example
unzip fonts.zip -d ./new-future-studio-fonts  

Notice: the unzip command won’t create non-existent paths on your disk. If you want to extract the archive into a non-existent folder path, you’ll run into errors.

For example, a directory non-existent-folder does not exist in the current path. If you want to unzip into a subdirectory of this folder, you’ll run into an error.

$ unzip fonts_otf.zip -d ./non-existent-folder/fonts
Archive:  fonts_otf.zip  
checkdir:  cannot create extraction directory: ./non-existent-folder/fonts  
           No such file or directory

That’s it. Unzipping a file from the command line is pretty straightforward using unzip <file> -d <folder>.

Tuesday, February 23, 2021

PHP coding Ke exe file menggunakan Inno Setup

 What is PHP Desktop?

Mind you, the development workflow you are used to while creating web applications remains the same. The step of turning an existing website into a desktop application is basically a matter of copy and paste.

PHPDesktop is an all-made container that will just swallow your project. With that, you can easily transform an existing website into a desktop application without any modification. When you download PHP Desktop, you will have some set of files and folders; among them, you will have a folder called www in which you will just paste your entire application.

For those who have used WampServer, Xamp or EasyPhp, it won't be a problem to understand the concept. When you are using these local servers, you usually create your projects into a particular folder called www, htdocs, or localweb. It differs from one server to another, but the concept remains the same. That particular folder helps your webserver to know where to run your application (website) from.

PHP Desktop works the same way. The difference is that PHP Desktop does not require any particular installation; it is an all-in-one portable set of all these local servers have and it does all you can do with WampServer or Xamp and others in the same family.

PHP Desktop comes with a .exe file. Whenever you run that .exe, it will go into the www folder and run your index file. I am going to explain this process later in this tutorial.

Saturday, February 22, 2020

Reac Native 0.60 eror navigation gesture

null is not an object ( evaluating 'RNGestureHandlerModule.default.Direction')#676

bunny100 opened this issue on Jul 8, 2019 · 78 comments

Hi,
Please first run this command : npm uninstall react-native-gesture-handler --save
Second : npm install react-native-gesture-handler --save
Third : react-native link react-native-gesture-handler
Forth : npm start
Finally this is work :))
This work for me, thank you,
run well in ios and android, react navigation 5.x


Friday, January 31, 2020

Login server with SSH key

  1. Use the key to log in to the SSH client as shown in the following example, which loads the key in file deployment_key.txt, and logs in as user demo to IP 192.237.248.66:
       ssh -i deployment_key.txt demo@192.237.248.66
    
  2. When you are prompted to confirm the connection, type yes and then press Enter.
  3. If your SSH key requires a password, enter it when prompted to complete the connection.

Tuesday, September 17, 2019

Cara membuat default Font di MS. Word


Start with a blank document, or if your document already contains text that is formatted with the properties that you want to use, select that text.
  1. On the Home tab, click the Font Dialog Box Launcher, and then click the Font tab.

  1. Select the options that you want to apply to the default font, such as font style and font size. If you selected text in step 1, the properties of the selected text are set in the dialog box.


  1. Click Set As Default, and set the scope of your changes:
    • Select This document only? if you want your changes to apply to only the current document.
    • Select All documents based on Normal .dotm template? if you want your changes to apply to any document based on the Normal template.

  1. Click OK to apply your changes.


Wednesday, August 14, 2019

SSH eror denied public key

The issue is within your sshd_config file.
Here is the ULTIMATE solution to this issue:
  1. Log as root to your Ubuntu server
  2. Use vim or nano to edit the contents of /etc/ssh/sshd_config
    Eg. vi /etc/ssh/sshd_config or nano /etc/ssh/sshd_config
  3. Now go to the very bottom of the file (to the line with PasswordAuthentication) - Change the value next to PasswordAuthentication from no to yes. 
    It should now look like this:
    # Change to no to disable tunnelled clear text passwords
    PasswordAuthentication yes
    
  4. Save the file and then run the following command to reload the SSH config:
    sudo service sshd reload
With this done, you can now set up your new SSH key for your LOCAL device.
To do this, you can run the following from your LOCAL device, not the server:
ssh-copy-id username@droplet.ip
(Make sure to replace username with your username on the droplet and droplet.ip with the full IP address of your droplet)

Sunday, August 11, 2019

Ifconfig Tidak ada di Debian terbaru, Begini solusinya

Call me old fashioned, but I still prefer using ifconfig command. It's not as cool as the ip command found in recent Linux distros, but familiar and universal enough to be found pretty much everywhere else. This post shows how to install packages to make ifconfig working again.

/sbin/ifconfig: no such file or directory

Yep, that's the error message I'm seeing on most recent distros. This simply means that ifconfig is no longer a core functionality installed with a base OS. You can still get it by installing net-tools package in your environment.
Here's how my attempt looked on Debian 9 (Stretch) VM just a few minutes ago:
greys@debian9:~$ ifconfig -a
-su: /sbin/ifconfig: No such file or directory

Install net-tools package for ifconfig and more

Simple enough step (I just know and remember that ifconfig is in net-tools package):
You need to have superuser powers, and by default Debian 9 doesn't have sudo installed – so I'm just using su command to become root:
greys@debian9:~$ su -
Password:
And now we install the net-tools package:
root@debian9:~# apt install net-tools
Reading package lists... Done
Building dependency tree
Reading state information... Done
The following NEW packages will be installed:
net-tools
0 upgraded, 1 newly installed, 0 to remove and 154 not upgraded.
Need to get 248 kB of archives.
After this operation, 963 kB of additional disk space will be used.
Get:1 http://ftp.ie.debian.org/debian stretch/main amd64 net-tools amd64 1.60+git20161116.90da8a0-1 [248 kB]
Fetched 248 kB in 0s (601 kB/s)
Selecting previously unselected package net-tools.
(Reading database ... 128276 files and directories currently installed.)
Preparing to unpack .../net-tools_1.60+git20161116.90da8a0-1_amd64.deb ...
Unpacking net-tools (1.60+git20161116.90da8a0-1) ...
Processing triggers for man-db (2.7.6.1-2) ...
Setting up net-tools (1.60+git20161116.90da8a0-1) ...
That's it, ifconfig should start working right away:
root@debian9:~# ifconfig -a
enp0s3: flags=4163<UP,BROADCAST,RUNNING,MULTICAST> mtu 1500
inet 192.168.X.Y netmask 255.255.255.0 broadcast 192.168.1.255
inet6 fe80::a00:27ff:febe:8a41 prefixlen 64 scopeid 0x20<link>
ether 08:00:27:be:8a:41 txqueuelen 1000 (Ethernet)
RX packets 94337 bytes 138887593 (132.4 MiB)
RX errors 0 dropped 0 overruns 0 frame 0
TX packets 31380 bytes 2338487 (2.2 MiB)
TX errors 0 dropped 0 overruns 0 carrier 0 collisions 0

lo: flags=73<UP,LOOPBACK,RUNNING> mtu 65536
inet 127.0.0.1 netmask 255.0.0.0
inet6 ::1 prefixlen 128 scopeid 0x10<host>
loop txqueuelen 1 (Local Loopback)
RX packets 1154 bytes 292002 (285.1 KiB)
RX errors 0 dropped 0 overruns 0 frame 0
TX packets 1154 bytes 292002 (285.1 KiB)
TX errors 0 dropped 0 overruns 0 carrier 0 collisions 0

Saturday, August 10, 2019

Cara Install PosgreSQL di Debian

PostgreSQL is an open source object-relational database system. It is one of leading database server used for production servers. This tutorial will help you to install the PostgreSQL database server on Debian 8 Jessie systems.
Step 1 – Prerequsities
First, you need to import PostgreSQL packages signing key on your system. Use the below command to import the key.
wget -q https://www.postgresql.org/media/keys/ACCC4CF8.asc -O - | sudo apt-key add -
Now add PostgreSQL apt repository in your system as per your operating system. These are suggested on official PostgreSQL website using following command.
sudo sh -c 'echo "deb http://apt.postgresql.org/pub/repos/apt/ jessie-pgdg main" >> /etc/apt/sources.list.d/pgdg.list'

Step 2 – Install PostgreSQL on Debian 8

At this stage, you have successfully added PostgreSQL official repository in your system. Now update the repository list. After that install Latest PostgreSQL Server in our Ubuntu system using following commands.
sudo apt-get update
sudo apt-get install postgresql postgresql-contrib

Step 3 – Connect to PostgreSQL

After installing the PostgreSQL database server by default, it creates a user ‘postgres’ with role ‘postgres’. It also creates a system account with the same name ‘postgres’. So to connect to postgres server, login to your system as user postgres and connect database.
sudo su - postgres
psql
Now you are logged in to PostgreSQL database server. To check login info use following command from database command prompt.
postgres-# \conninfo
To disconnect from PostgreSQL database command prompt just type below command and press enter. It will return you back to Debian command prompt.
postgres-# \q
Your PostgreSQL installation has been completed successfully. 

Modifikasi pathname pada terminal linux menjadi lebih pendek

Bagi pengguna linux turunan ubuntu seperti ubuntu 16.04 yang saya gunakan, ada beberapa hal yang cukup membuat kita ribet dengan pathname pa...