The "XAMPP" stack is an acronym where X stands for an operating system, A stands for Apache web server, M stands for MySQL or MariaDB database server and PP stands for PHP and Perl. So, as we are installing XAMP stack in our Ubuntu 16.04 linux machine, we can call is LAMPP stack where L stands for Linux. XAMPP stack is used together in a group in order to host dynamic PHP based websites and web applications. This setup enables us to run large numbers of web based applications and websites as we can find large numbers of PHP based web applications on the internet. Now, we'll move ahead towards the step-wise installation of XAMPP stack in our Ubuntu 16.04 machine.
System Requirements
Here's the minimum system requirements to install and run XAMPP stack in Ubuntu 16.04 LTS server.
RAM : Minimum 1GB memory
HDD : At least 1 GB free disk space
CPU : 1 Core Processor
1. Login to Ubuntu 16.04 machine
First of all, we'll need to login to our Ubuntu 16.04 machine. As we're going to install XAMPP stack in an Ubuntu 16.04 server, we'll need to login through SSH which can be done using a terminal or putty if we're using Windows as client operating system. In a linux or unix machine, we'll open a terminal and then run the following command to SSH into the Ubuntu server.
$ ssh user@192.168.10.222Here, user and 192.168.10.222 is the username and IP address of the Ubuntu 16.04 server respectively that we're trying to access. Please replace them according to your system's configuration.

Once we're into the shell of the machine, we'll switch to sudo or root mode so that we can have full access to our machine and then we can perform the further installations.
$ sudo -s2. Upgrading the system
Then we'll now update the local repository index which keeps track of all the packages available for Ubuntu 16.04 LTS. We'll need to run the following command in sudo or root access.
# apt updateOnce the package local repository has been updated
# apt upgrade3. Downloading Bitnami XAMPP stack
Once our system is upgraded to the latest packages, we'll now download the latest XAMPP stack from the official download page. Here, we'll download the latest XAMPP stack ie version 7.1.1 which contains Apache 2.4, MariaDB 10.1, Perl 5.16, ProFTPD 1.3, PHP 7.1.1, phpMyAdmin 4.7 and its required modules. Downloads can be done using any web browser and then upload it to the Ubuntu 16.04 server but here, we'll download from the terminal using the download link we got from the download page. To download the file, we're using wget command line file downloader.
# wget https://www.apachefriends.org/xampp-files/7.1.10/xampp-linux-x64-7.1.10-0-installer.run
After the download has completed, we'll need to make the downloaded file executable so that we can execute it and install the binary of XAMPP stack.
# chmod +x xampp-linux-x64-7.1.10-0-installer.run4. Installing XAMPP stack
If everything above is done as expected, we'll now be able to install it by running the executable binary installer. To run the executable .run file, we'll need to run the following command in terminal.
# ./xampp-linux-x64-7.1.10-0-installer.run
If we have X11forwarding enabled in our ssh server, we'll be welcomed with the Bitnami GUI installer but as we've it disabled in our server, we'll simply proceed with the CUI installer. Here, we're asked with few questions on how we wanna setup our stack, we'll simply hit enter to proceed with the default options.
5. Managing the services
Now, as our stack has installed successfully, we'll now learn how we can manage all the services of the stack.
Starting
In order to start all the xampp services, we need to run the following command in the terminal.
# /opt/lampp/xampp startStart Apache only :
# /opt/lampp/xampp startapacheStart Proftpd FTP server only :
# /opt/lampp/xampp startftpStart MySQL Database server only :
# /opt/lampp/xampp startmysqlStopping
To stop all the xampp services, we need to run the following command.
# /opt/lampp/xampp stopTo stop Apache only :
# /opt/lampp/xampp stopapacheTo stop Proftpd FTP server only :
# /opt/lampp/xampp stopftpTo stop MySQL Database server only :
# /opt/lampp/xampp stopmysqlRestarting
And in order to restart all the xampp services, we need to run the following command in our terminal.
# /opt/lampp/xampp restartAnd for other commands we can check the help section of xampp by running the following.
# /opt/lampp/xampp --helpUninstalling XAMPP stack
If we're done with xampp stack and wanna uninstall it, we'll need to run the following command in sudo or root mode.
# /opt/lampp/uninstallOnce the above command is executed, we'll be asked if we wanna uninstall XAMPP with all its modules where we'll press y and hit enter to uninstall it.
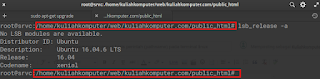
Do you want to uninstall XAMPP and all of its modules? [Y/n]: y
----------------------------------------------------------------------------
Uninstall Status
Uninstalling XAMPP
0% ______________ 50% ______________ 100%
#########################################
Info: Uninstallation completed
Press [Enter] to continue:
Once it's uninstalled, it will ask us to press Enter button to return to the terminal.
Wrapping Up
XAMPP stack is an awesome stack packaged by Bitnami especially focused for the developers for easy installation and provisioning in the development servers. Bitnami XAMPP stack is not recommended for production at all. With the bitnami installer, it only takes few minutes to install a complete working Apache, MySQL, PHP and Perl stack with PHPMyAdmin, Proftpd, SSL support and more packages required for hosting a PHP based web application or website. This article should work fine with other Ubuntu 16.04 derivatives too and even on Desktop editions. If you have any questions, suggestions, feedback please write them in the comment box below. Thank you! Enjoy


No comments:
Post a Comment